Cocos2d-x-2.2.0 Setup Guide (for Android and iOS)
2013-11-27 by terryoy, in guides
This guide describes the steps to setup a development environment for Cocos2d-x the cross-platform game development framework, on Linux and Mac OSX.
1. Download packages
In this guide, we'll use cocos2d-x-2.x as example, and we'll setup for Android and iOS app development. So, the following packages will be needed:
| Packages | Links | Remark |
|---|---|---|
| Cocos2d-x: | www.cocos2d-x.org/download | use latest of v2.x |
| ADT bundle: | developer.android.com/sdk/index.html | Android Development Tools |
| Android NDK: | developer.android.com/tools/sdk/ndk/index.html | legacy-toolchains package is not neccessary |
Unzip the three packages to a folder. For example, after I extract the files, the paths looks like:
~/develop/android/adt-bundle-linux-x86-20131030/eclipse
~/develop/android/adt-bundle-linux-x86-20131030/sdk
~/develop/android/adt-bundle-linux-x86-20131030/android-ndk-r9b
~/develop/cocos2dx/cocos2d-x-2.2.0/
Next go to Eclipe(for Android) or Xcode(for iOS) for next step.
2. Android Setup
Check device accessible
You better make sure you can access your android tablet before building it on the device. The method to check is a “adb devices” command(don't forget to turn on the debug mode on the tablet first):
$ cd $ANDROID_SDK_HOME/platform-tools
$ ./adb devices
* daemon not running. starting it now on port 5037 *
* daemon started successfully *
List of devices attached
????????????    no permissions
If you see the device listed without a valid name, and marked with “no permissions”, the reason is often that you started ADB Server not as root. Try to fix that is to restart the adb daemon in root access:
# be sure to close ADT first, because sometimes it make adb started in user even with sudo
$ sudo ./adb kill-server
$ sudo ./adb start-server
# check adb server running user
$ ps -ef | grep adb
root     15657     1  0 09:59 pts/0    00:00:00 adb -P 5037 fork-server server
# check device list
$ ./adb devices
List of devices attached
20080411    device
# try if you can connect to the device and run with shell
$ ./adb shell
If all successful, open Eclipse IDE and we'll build the project.
Importing The Library and The Projects
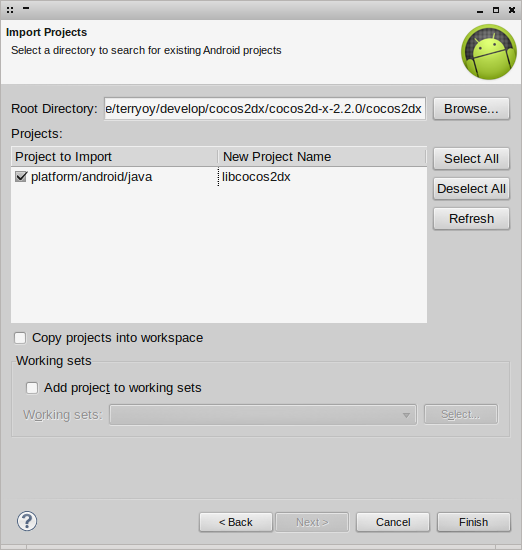
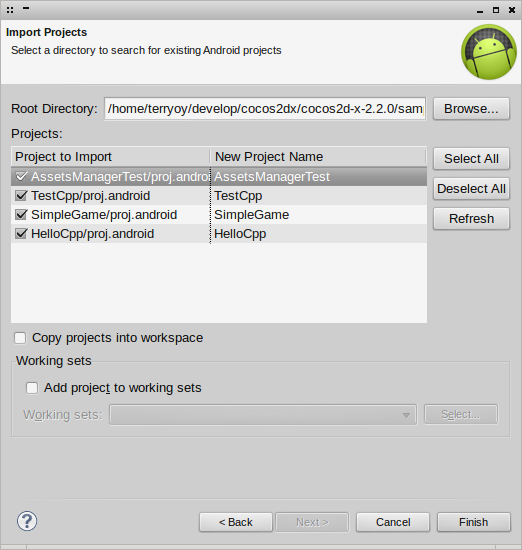
We'll import twice: one for the cocos2d-x library, one for the sample projects.
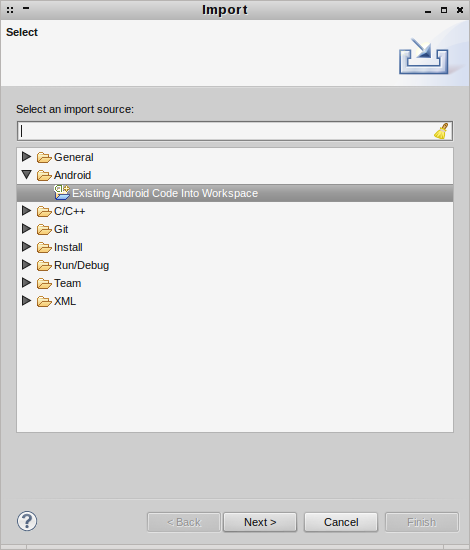
The search path for cocos2d-x library is “$COCOS2DX_ROOT/cocos2dx”
The search path for sample projects is “$COCOS2DX_ROOT/samples/Cpp/”(because we're going to use C++ for cocos2d-x development).
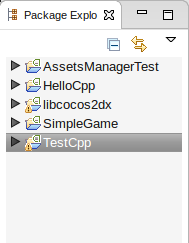
After that we'll see the projects in the workspace:
Setting Environment Variables
If you try building the project “TestCpp” now, you will probably find the below error:

It's because we have to set the environment variables for the compiler. It needs “COCOS2DX_ROOT” and “NDK_ROOT” to build the project. So open “Window -> Preferences -> C/C++ -> Build -> Environment” in the Eclipse IDE, and set the variables similar to below:
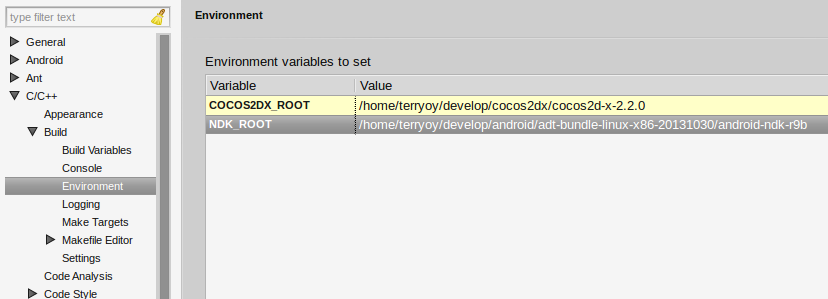
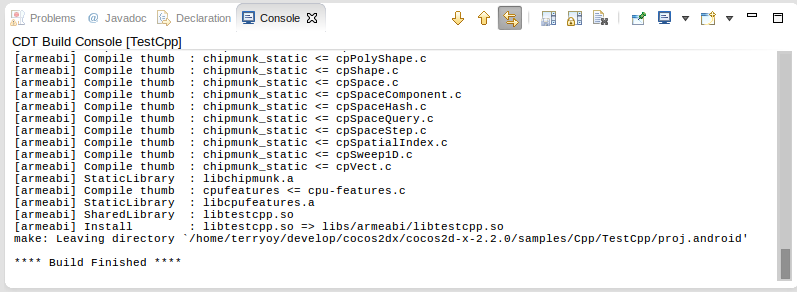
After that, select the “TestCpp” and build again, you should be able to see the build succesful messages:
Running on Tablet
Next try running it on the tablet. Click “Run” and (after the build) you will get the “Android Device Chooser” below:
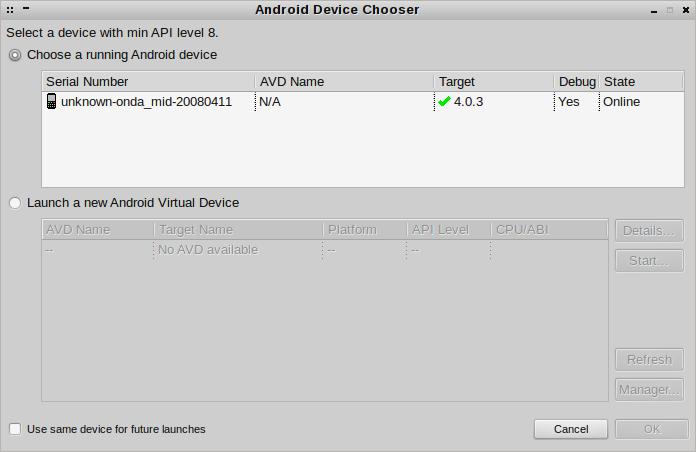
Here you could choose the plugged in tablet which you have configured in the previous steps to run the program. Or you could choose to create a new emulator to run it on your computer. If you have problem seeing the device in the list, go back to the “Check device accessible” step to check the device again.
If you find running the emulators very slow, check out the post here for suggestions.
3. Xcode Setup
(Since I had lost the log while setting up this, I won't update this part until I got a chance to try it again.)
Setting up in Xcode is pretty simple. Just extract the cocos2d-x-2.x.x.zip, and open the project files at ./samples/Cpp/HelloCpp/proj.ios/ with Xcode. Next, you should check the compiling errors and solve it one by one.
If the “cocos2dx.xcodeproj” sub-project displays as missing, you could open the . and select the “Location” for it, which should be pointed to ./cocos2dx/proj.ios/cocos2dx/
There are usually two build scheme in the Xcode project. One is for building the cocos2d-x framework, the other is the project it self. So before you build the project, you should build the cocos2d-x framework first.
4. Start a New Cross-platform Project
There is one script for creating a new cocos2d-x project under the path ./tools/project-creator/
$ ./create_project.py
Usage: create_project.py -project PROJECT_NAME -package PACKAGE_NAME -language PROGRAMING_LANGUAGE
Options:
  -project   PROJECT_NAME          Project name, for example: MyGame
  -package   PACKAGE_NAME          Package name, for example: com.MyCompany.MyAwesomeGame
  -language  PROGRAMING_LANGUAGE   Major programing lanauge you want to used, should be [cpp | lua | javascript]

Sample 1: ./create_project.py -project MyGame -package com.MyCompany.AwesomeGame
Sample 2: ./create_project.py -project MyGame -package com.MyCompany.AwesomeGame -language javascript
The new project will be created under ./projects/ under the root folder of cocos2d-x, and it is not easy if you want to put it outside this folder(for example, another git repos), because the project's dependencies uses relative paths to the cocos2d-x's components. It might differs in Xcode or in Eclipse, etc. So here we don't discuss further.